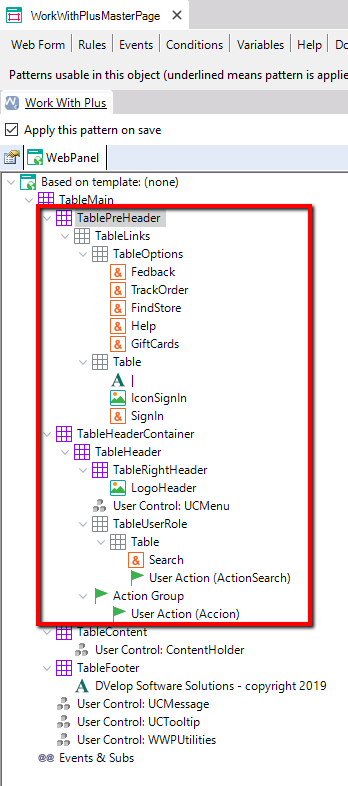
In this part, we will focus on the development of the header of the application, so open the "WorkWithPlusMasterPage" object and define the following structure:
For the IconSignIn Image node, you should use an appropriate Font Awesome class. For example:

Tip: use ctrl+z & ctrl+x within the hierarchical declaration to move the nodes between the different tables.
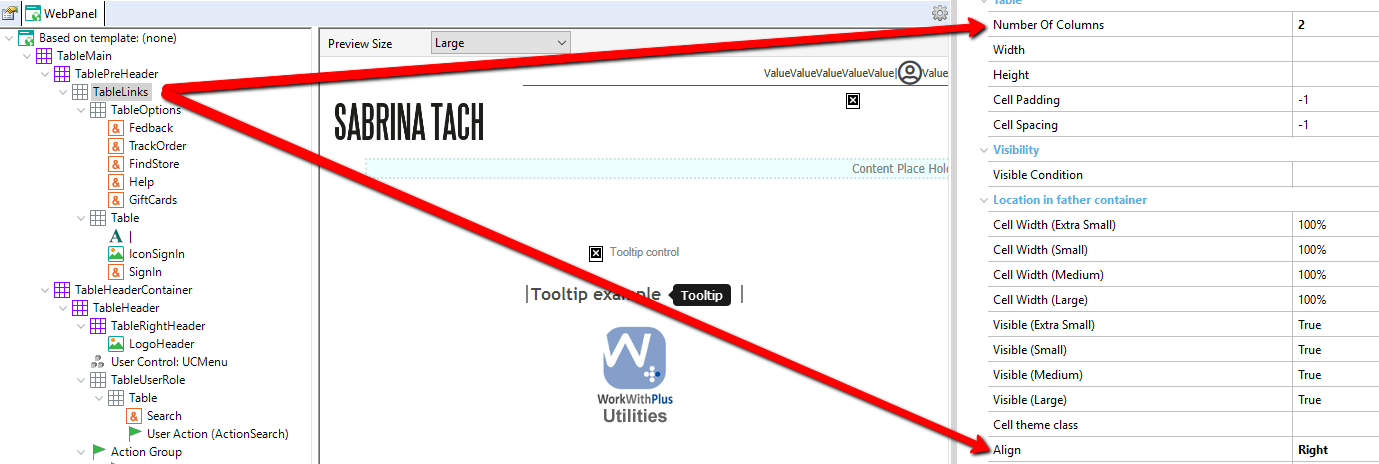
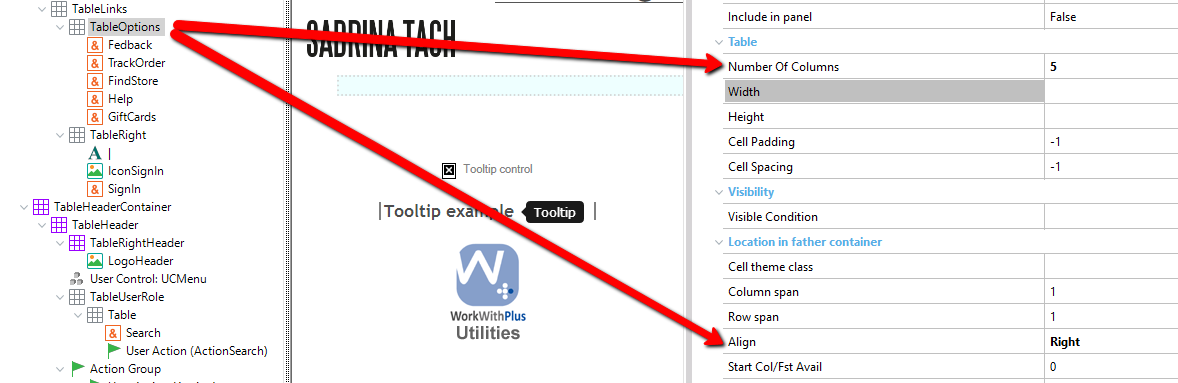
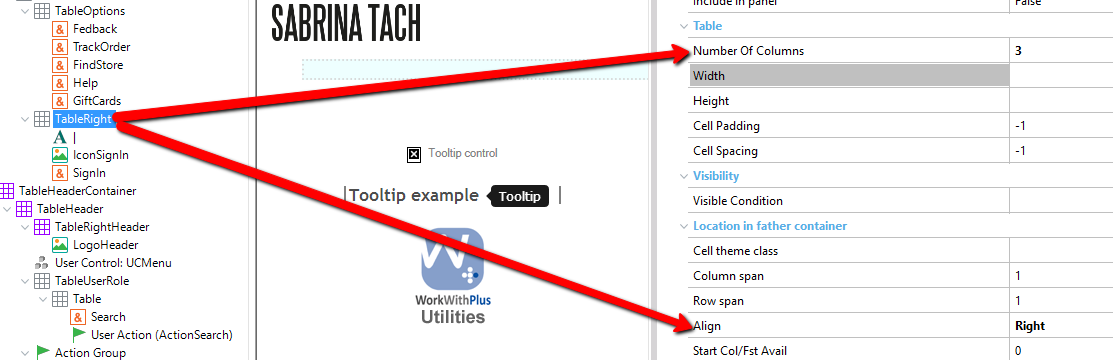
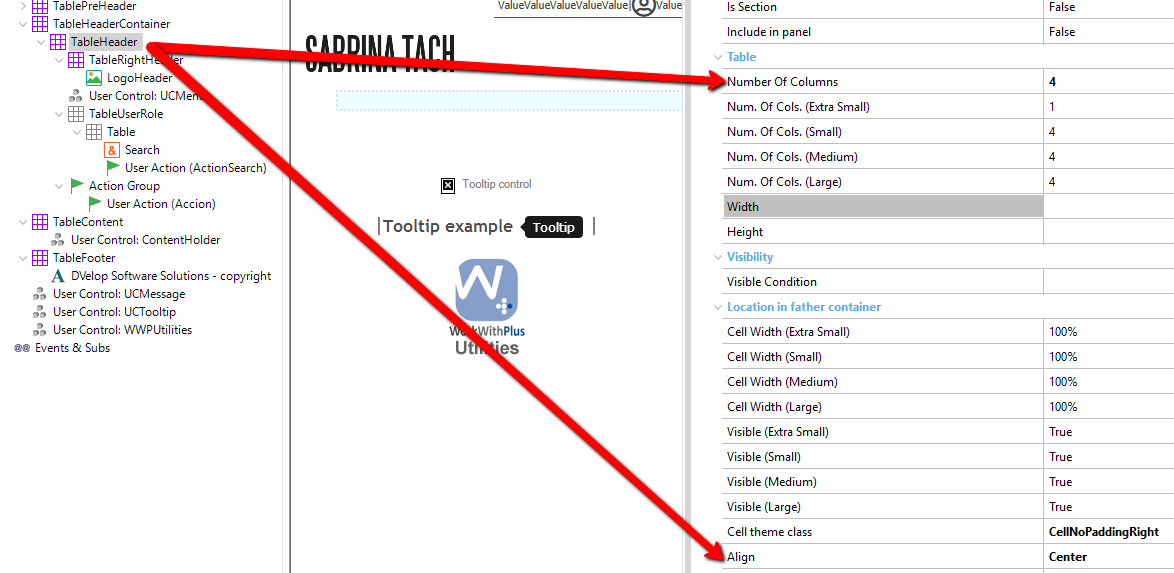
Once you have created the previous structure, you should set the proper amount of columns and align for each table:
TableLinks
TableOptions
TableRight
TableHeader
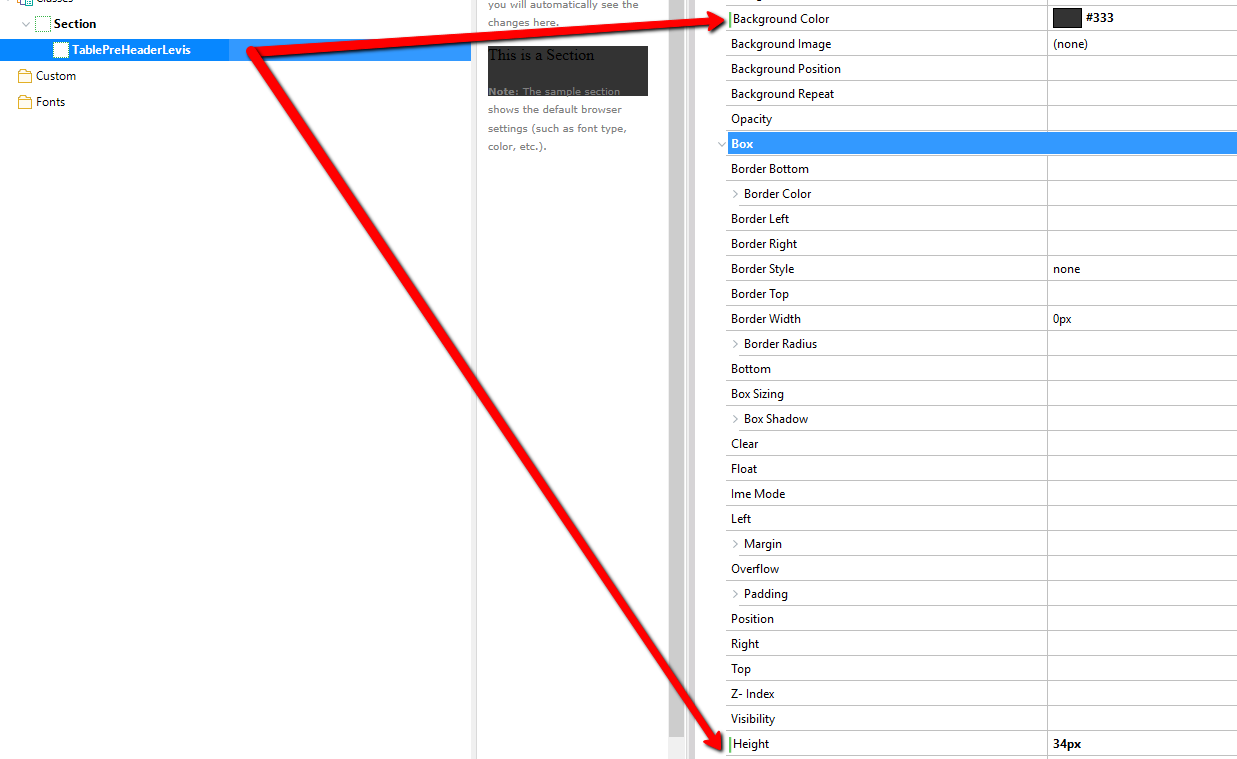
Then, open the "WorkWithPlusTheme" object and create or customize the following classes:
Class TablePreHeaderLevis
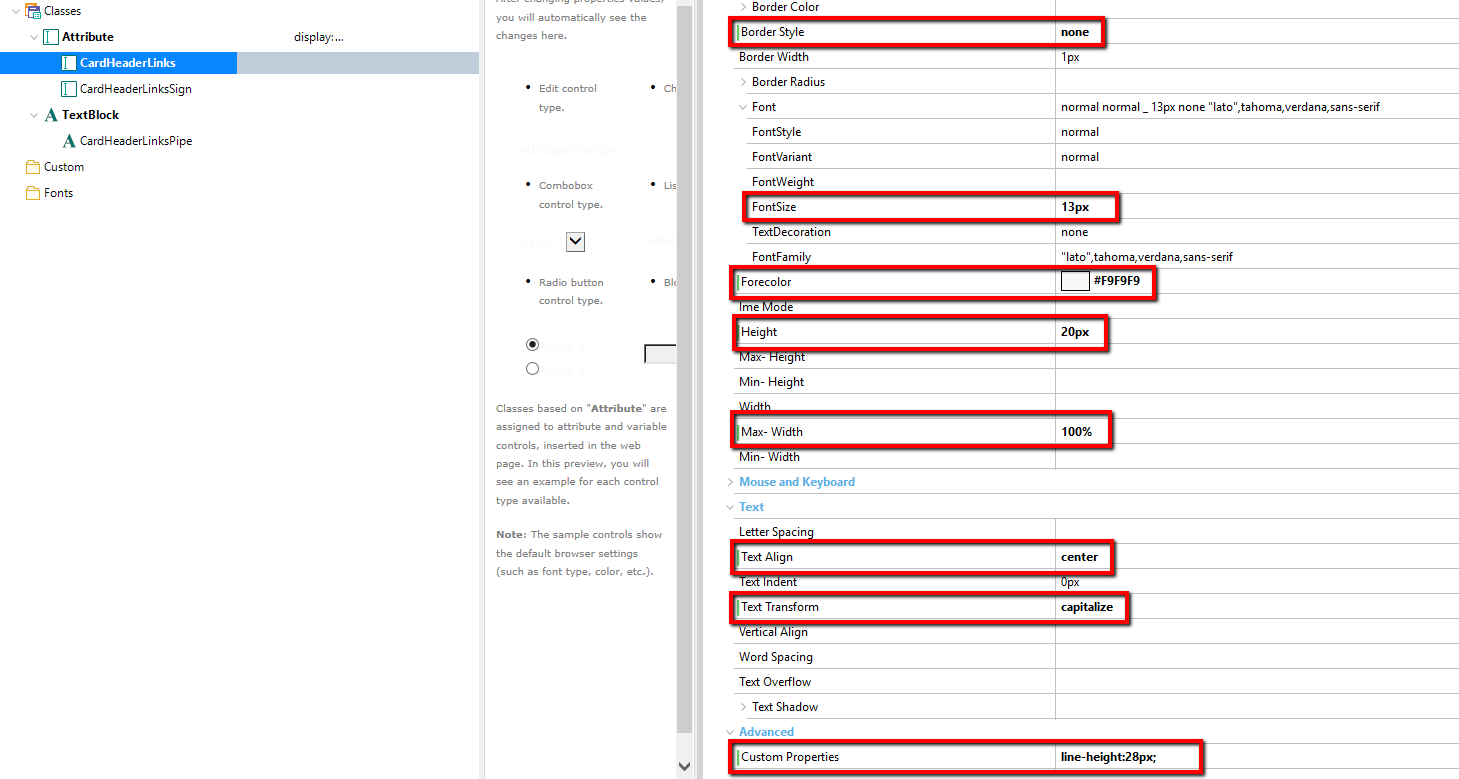
Class CardHeaderLink
Class CardHeaderLinksPipe
Set all the properties defined in class CardHeaderLink and add Margin Right: 20px:

Class CardHeaderLinksUser
Set all the properties defined in class CardHeaderLink but set Margin Top: 2px:

Class CardHeaderLinksSign
Set all the properties defined in class CardHeaderLink without any margin settings.
Class TableHeaderLevis

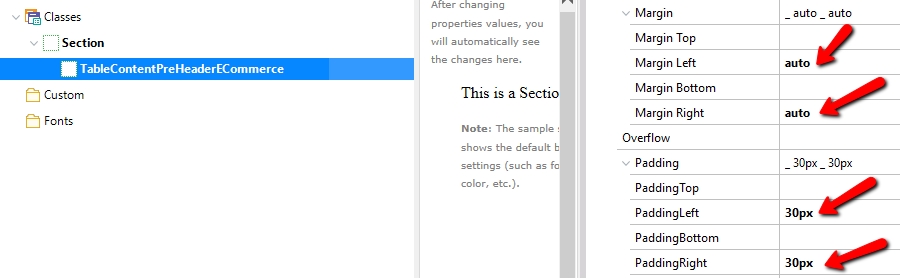
Class TableContentPreHeaderECommerce
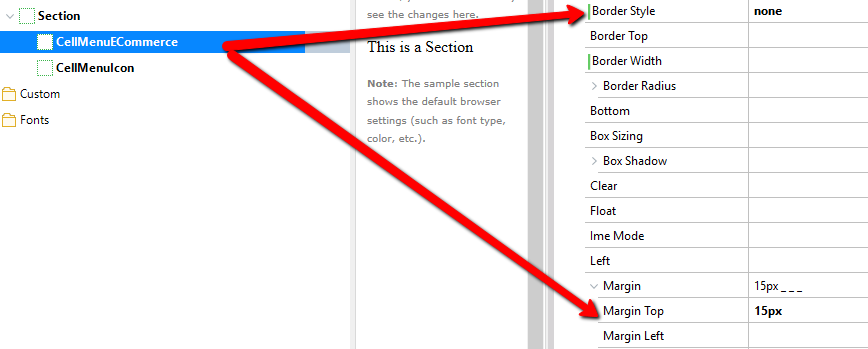
Class CellMenuECommerce
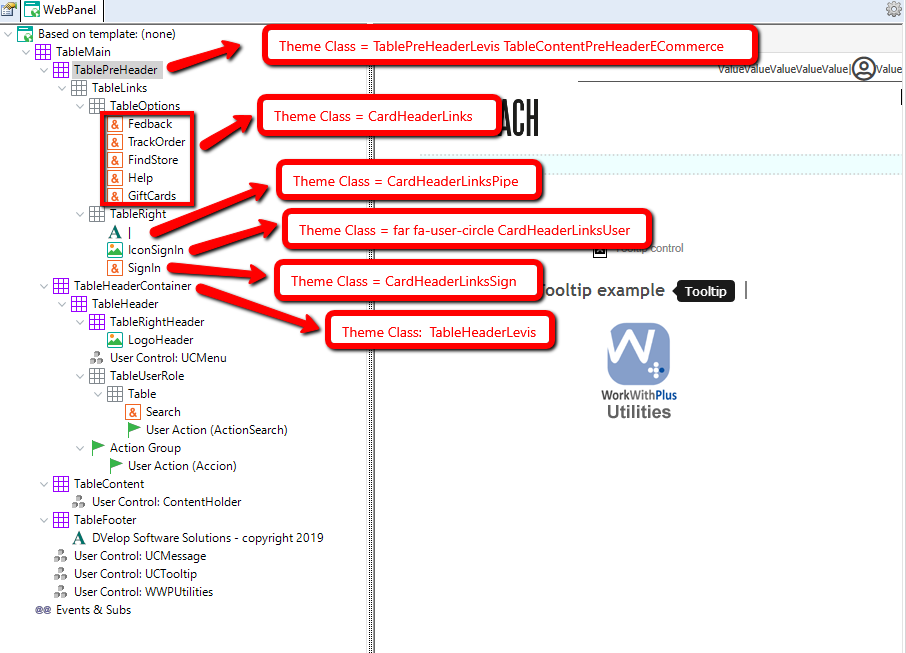
Finally, assign the created classes in the "Theme Class" property of the proper tables and controls according to the following definition:
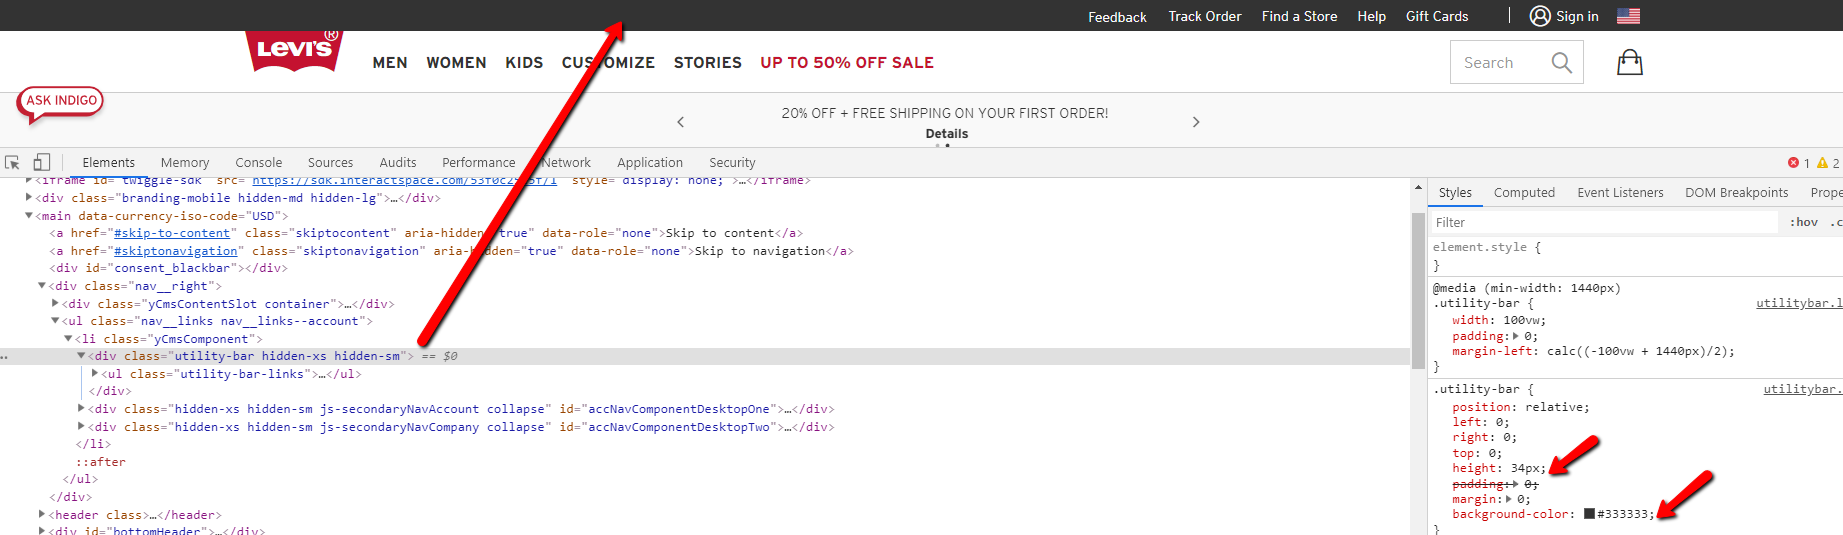
Suggestion: you can use Google Chrome Developer's Tools in order to inspect Levi's site and visualize the CSS properties applied. For example, we have created the CardHeaderLinks class by copying its properties from the following class:
While you are developing the screen, you can take advantage of WorkWithPlus real-time preview to visualize how the application will look like at runtime.
Run the application and visualize the results at runtime:

You can download the xpz for this part from: Part 3
|