|
Once you install WorkWithPlus 12, there are two possible scenarios:
In this scenario, install the WorkWithPlus 12 setup, open your KB, and add the following User Control in your Master Page (according to the Font Awesome version that you want to use):
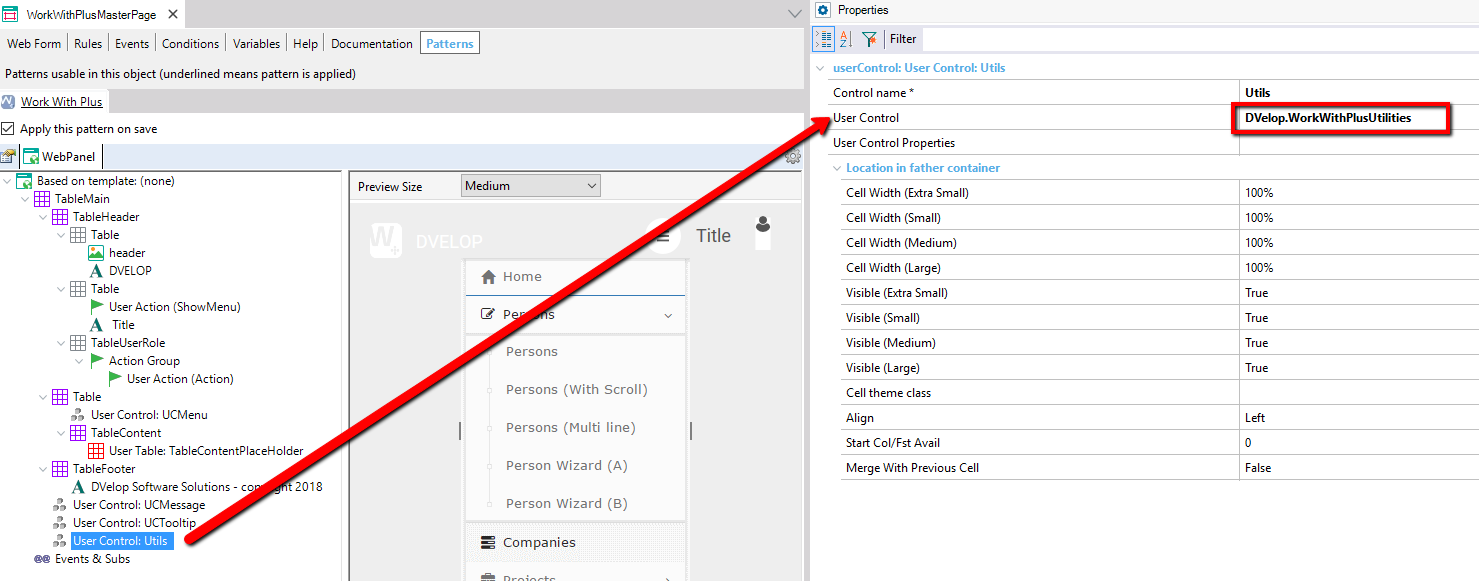
You should also set the following property:
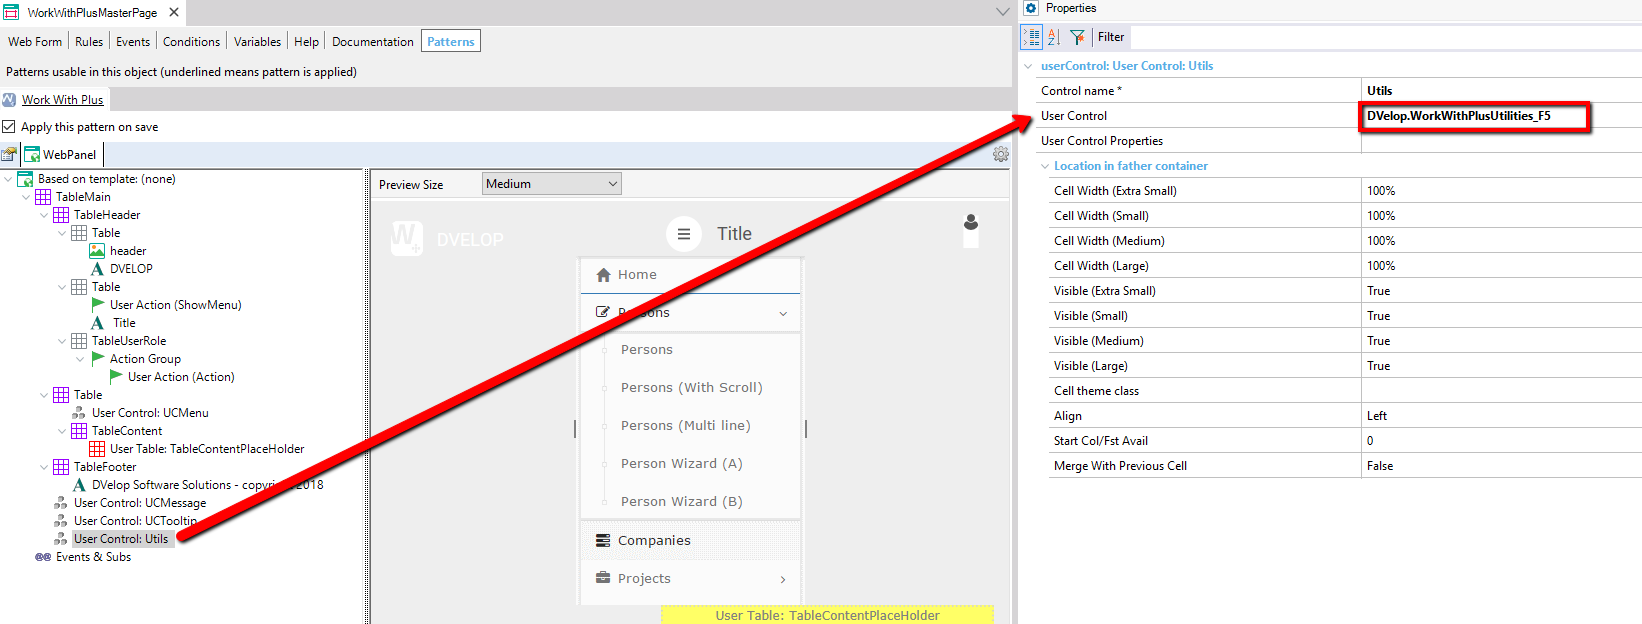
You should also set the following property:
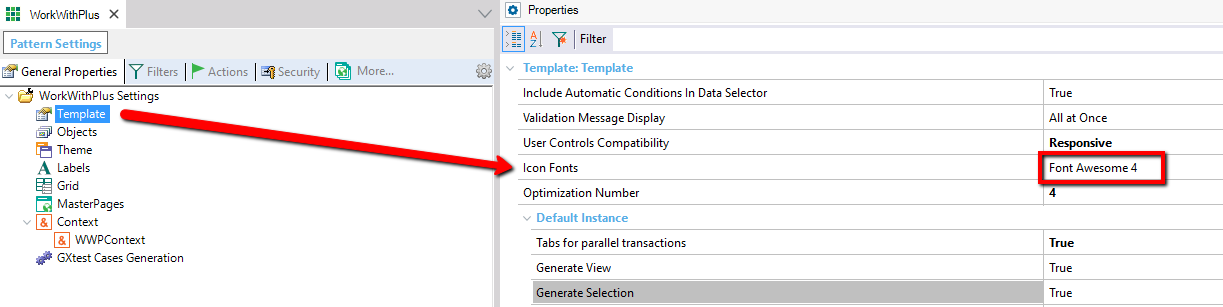
Important: If you are using Font Awesome 4, you can update to Font Awesome 5 according to the steps defined by Font Awesome: https://fontawesome.com/how-to-use/on-the-web/setup/upgrading-from-version-4
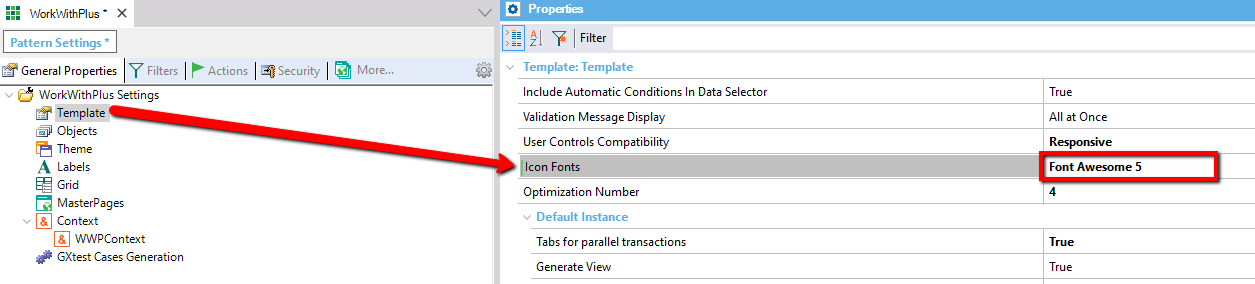
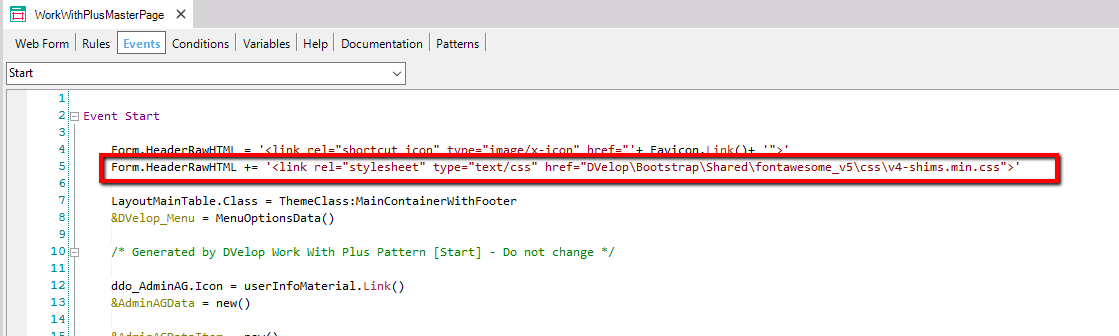
As explained on Font Awesome upgrade manual, you should include v4-shims.min.css to properly visualise your current icons. This file is already included in the KB resources under DVelop\Bootstrap\Shared\fontawesome_v5\css folder, you should include that css in the Master Page as follows:
Form.HeaderRawHTML += '<link rel="stylesheet" type="text/css" href="DVelop\Bootstrap\Shared\fontawesome_v5\css\v4-shims.min.css">'
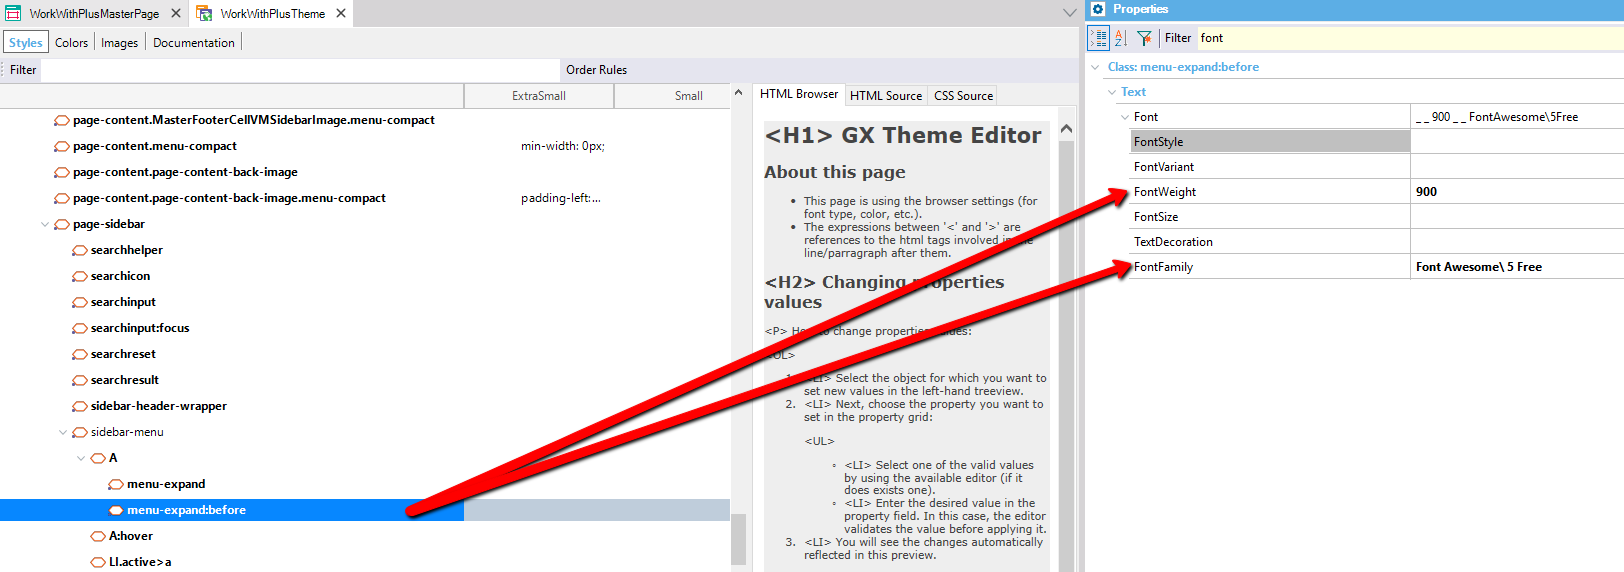
You also need to add the following class in the theme object:
You can check Font Awesome 5 icons at: https://fontawesome.com/icons?d=gallery.
When applying WorkWithPlus for the first time (for example, if you modify and save an instance), WorkWithPlus will import all the necessary resources so you can use the new features. After this process, you will be ready to use the new features!
If you don't want to add any new feature, just run your KB as you always do.
We always perform regression tests to ensure that the generated code within the versions remain the same, so you won't need to test again your screens.
When you import a new theme from the "Design System Wizard", WorkWithPlus is going to replace the templates defined within the WorkWithPlus Settings so you will have to impact again the customizations made on them.
This customizations may include:
- Event Blocks
- Automatic Conditions
- Automatic Rules
- Customizations in the layouts of the screens
- Etc.
In order to keep these customizations with the new theme we suggest the following steps:
You should mark your actual instances as updated so you will be sure that the only changes that will be applied are the ones regarding the new theme. This process should be done for Transaction template:

And also for each Web Panels template:

Import the desired settings and design from the Design System Wizard according to your needs. Once the import process is finished you can go on with the next step.
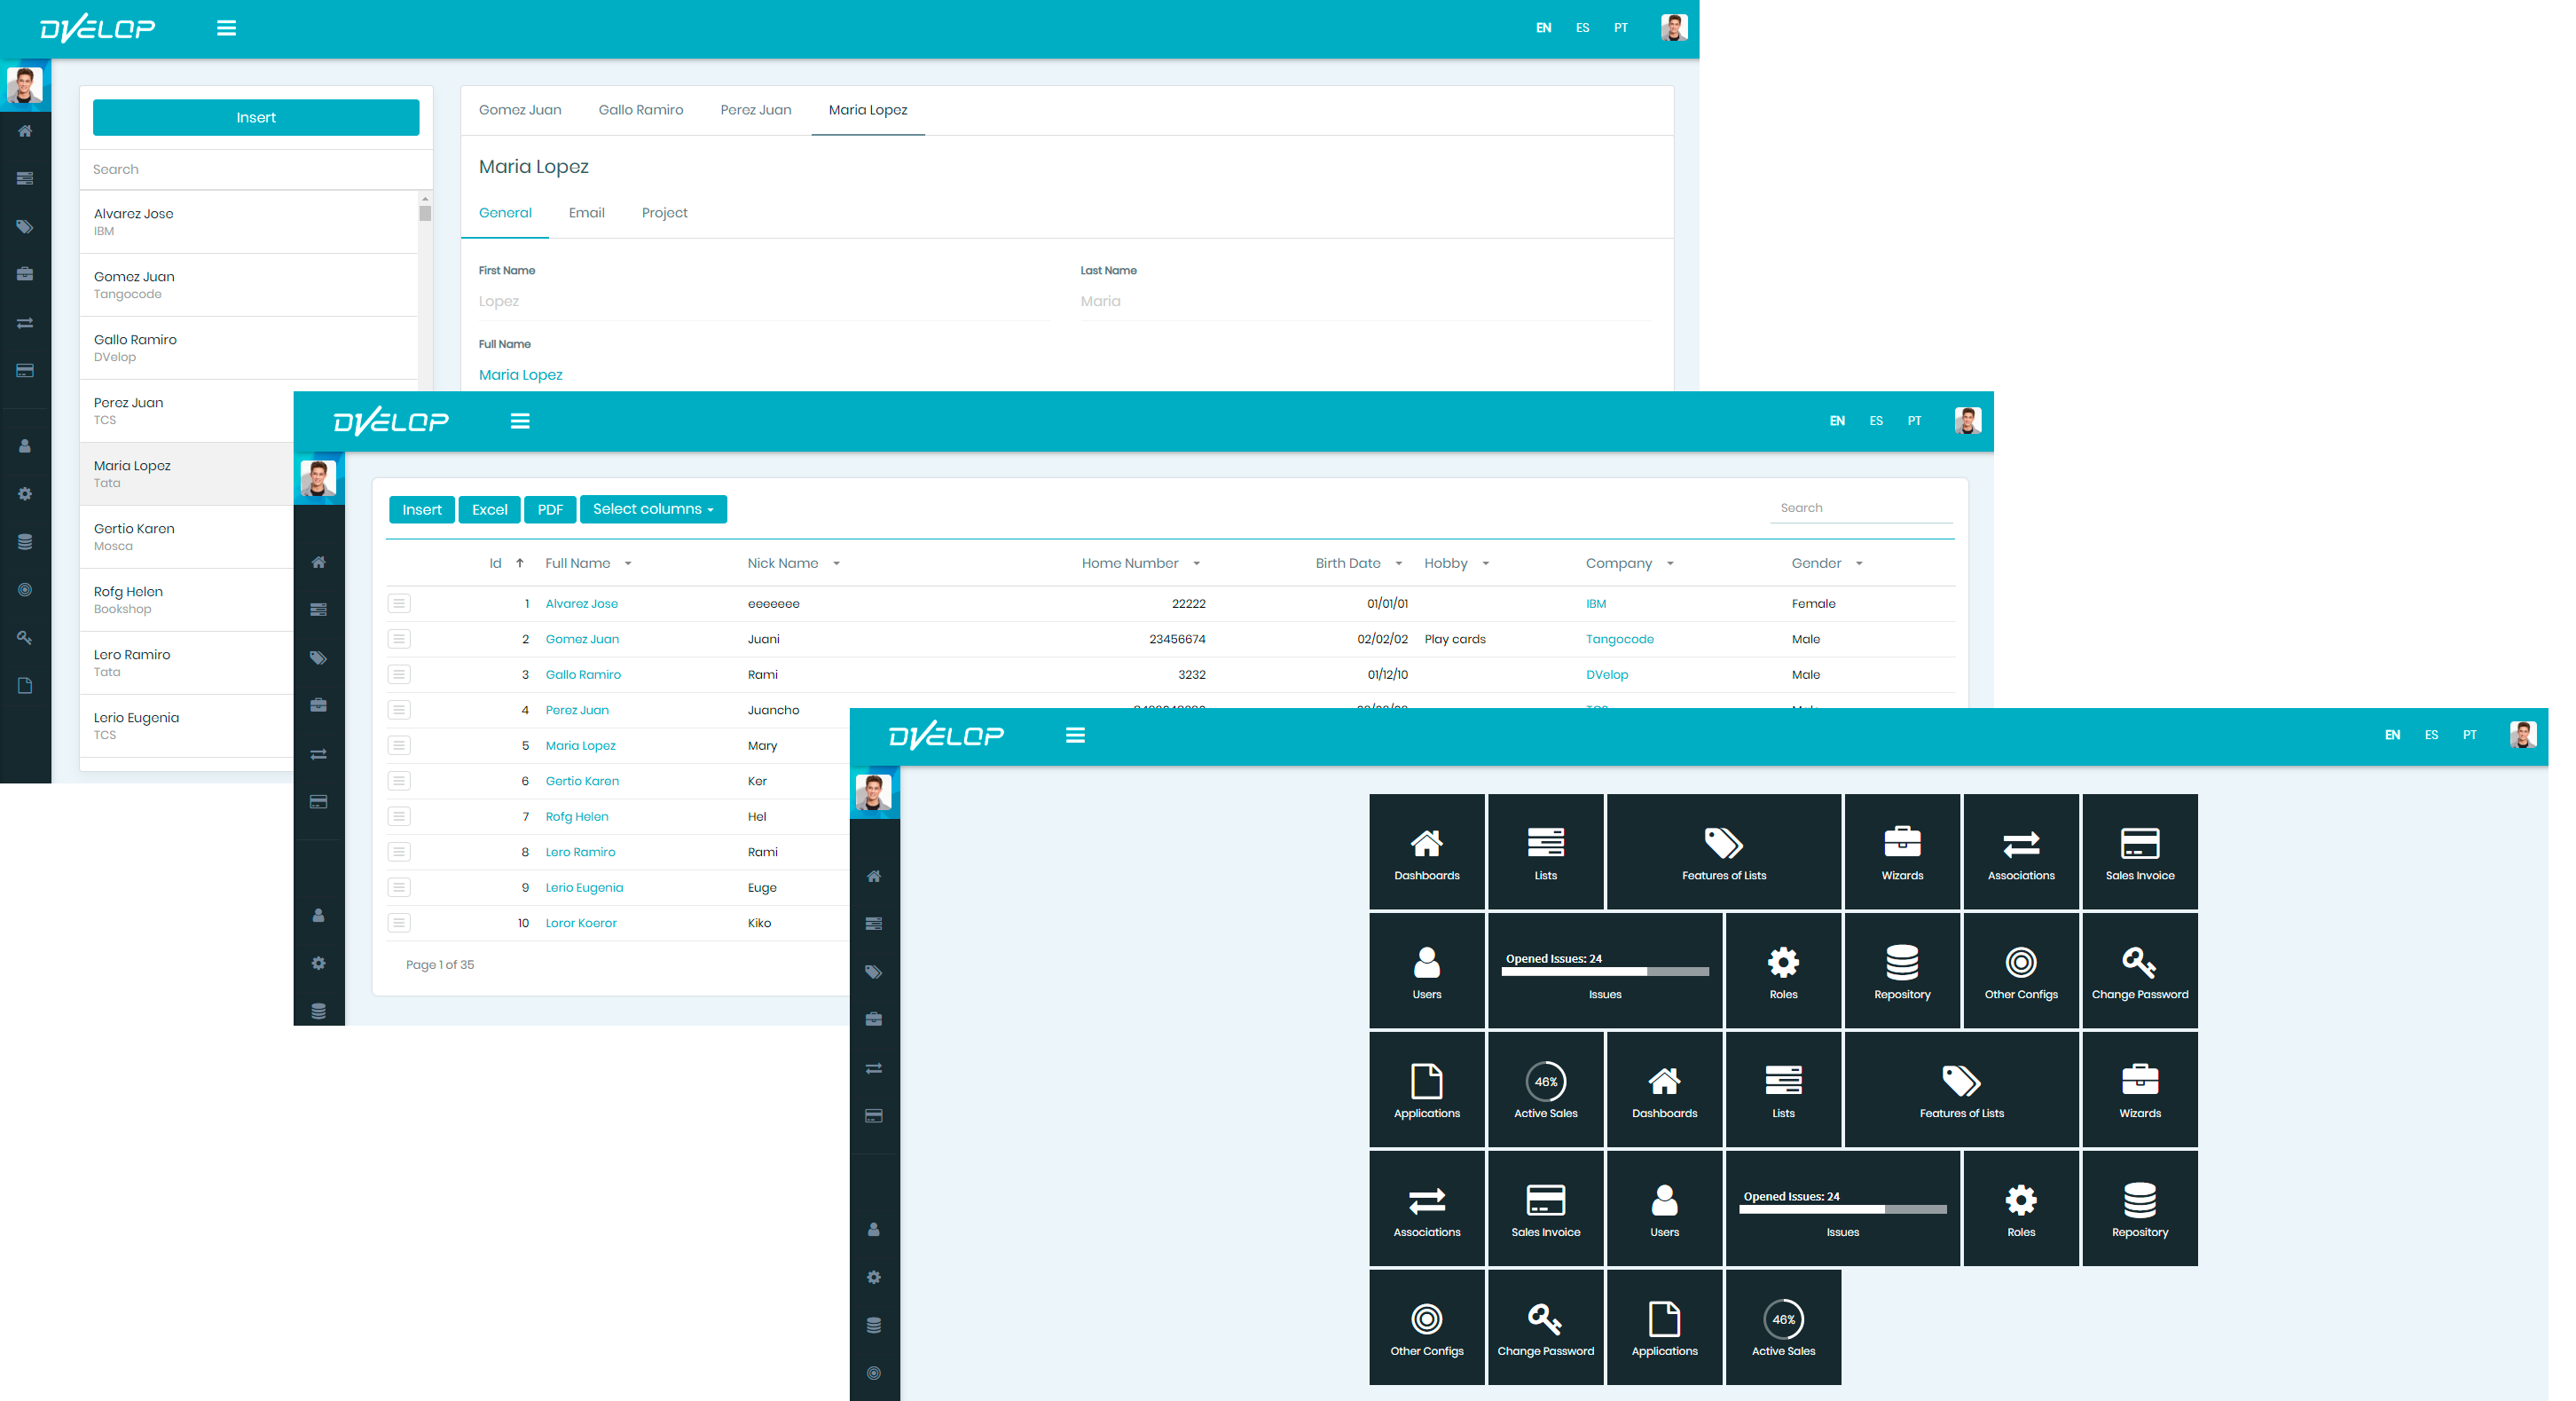
Open the WorkWithPlus Settings, as you can visualize it has the new theme and layout applied:
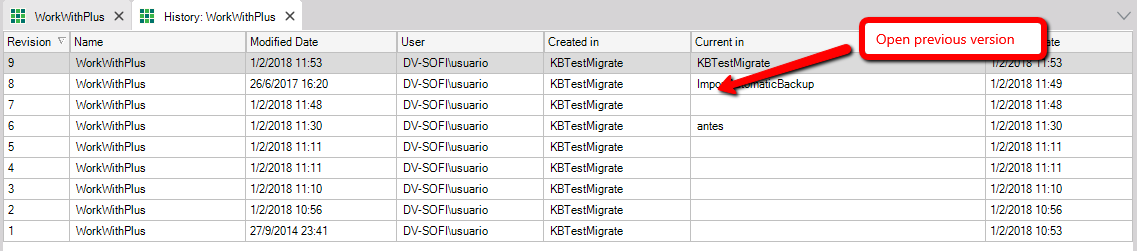
Open its History:
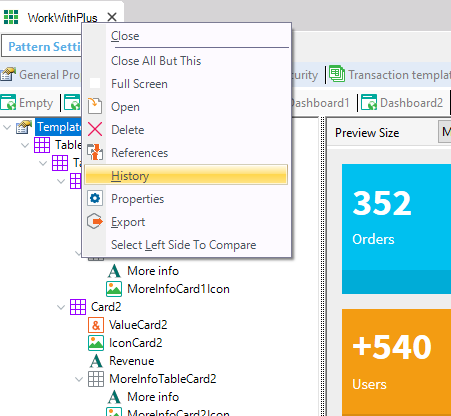
Select the latest version before the importing process as follows:
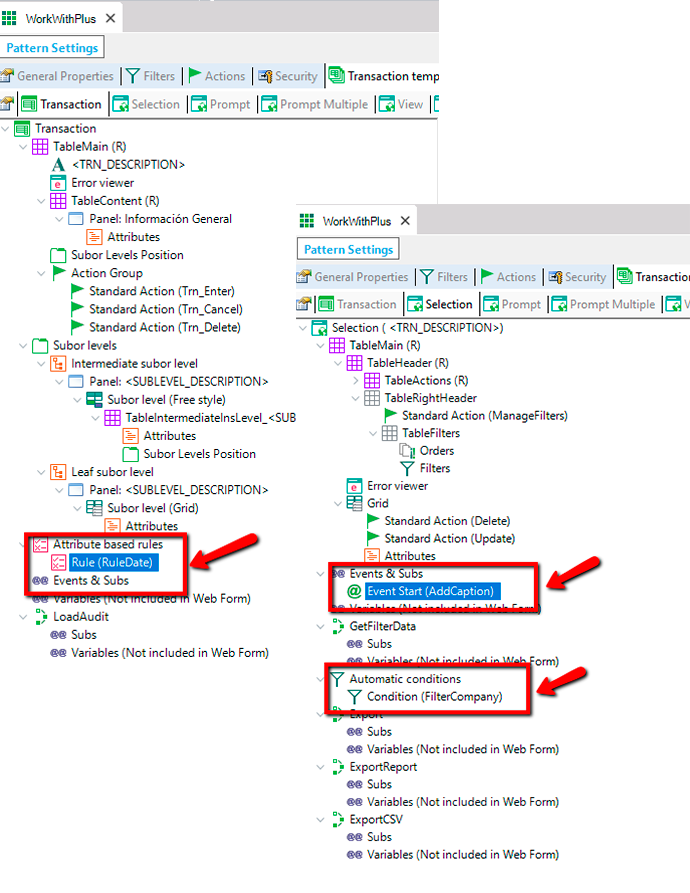
You will need to copy the customizations from the History version to the current WorkWithPlus Settings:
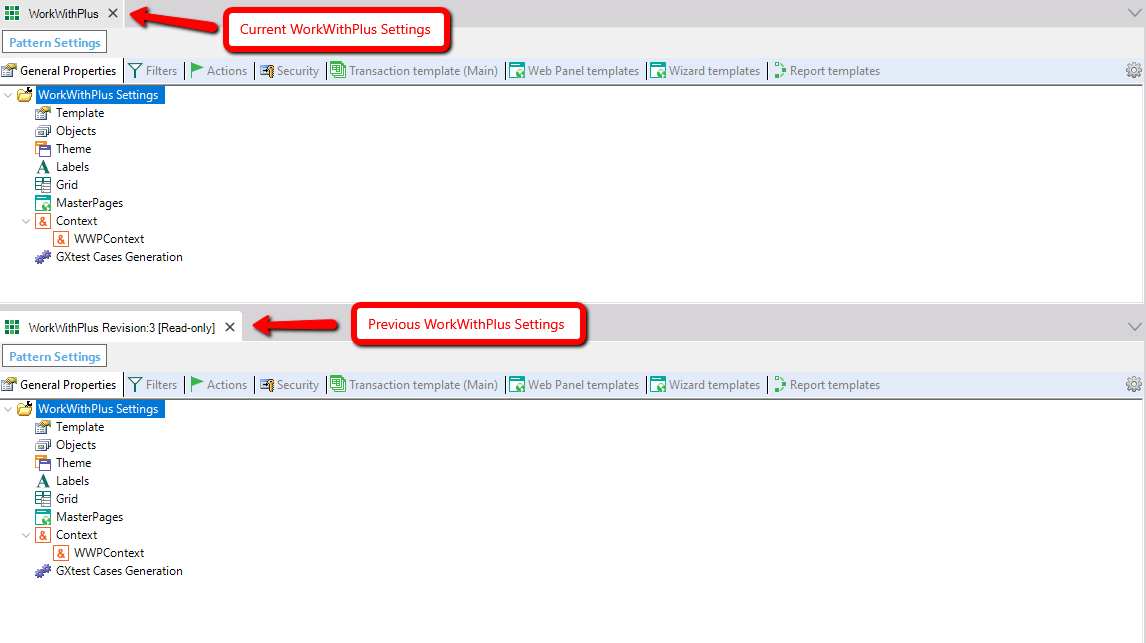
You can copy and paste the nodes of Automatic Rules, Automatic Conditions, Event Blocks, etc. to do it faster. For the layout customizations you will need to copy the properties from the different nodes.
In this way, you will have the new theme and layouts with your previous customizations.
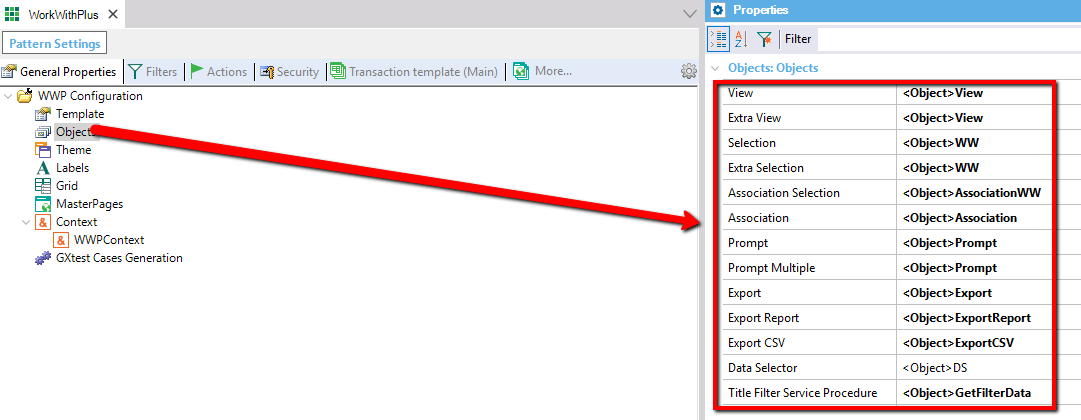
- If you had customized the Object's name pattern or you are migrating from WorkWithPlus 9 or lower versions, you should also impact that changes in the new WorkWithPlus Settings. So, you can copy the names from the History version to the current WorkWithPlus Settings:
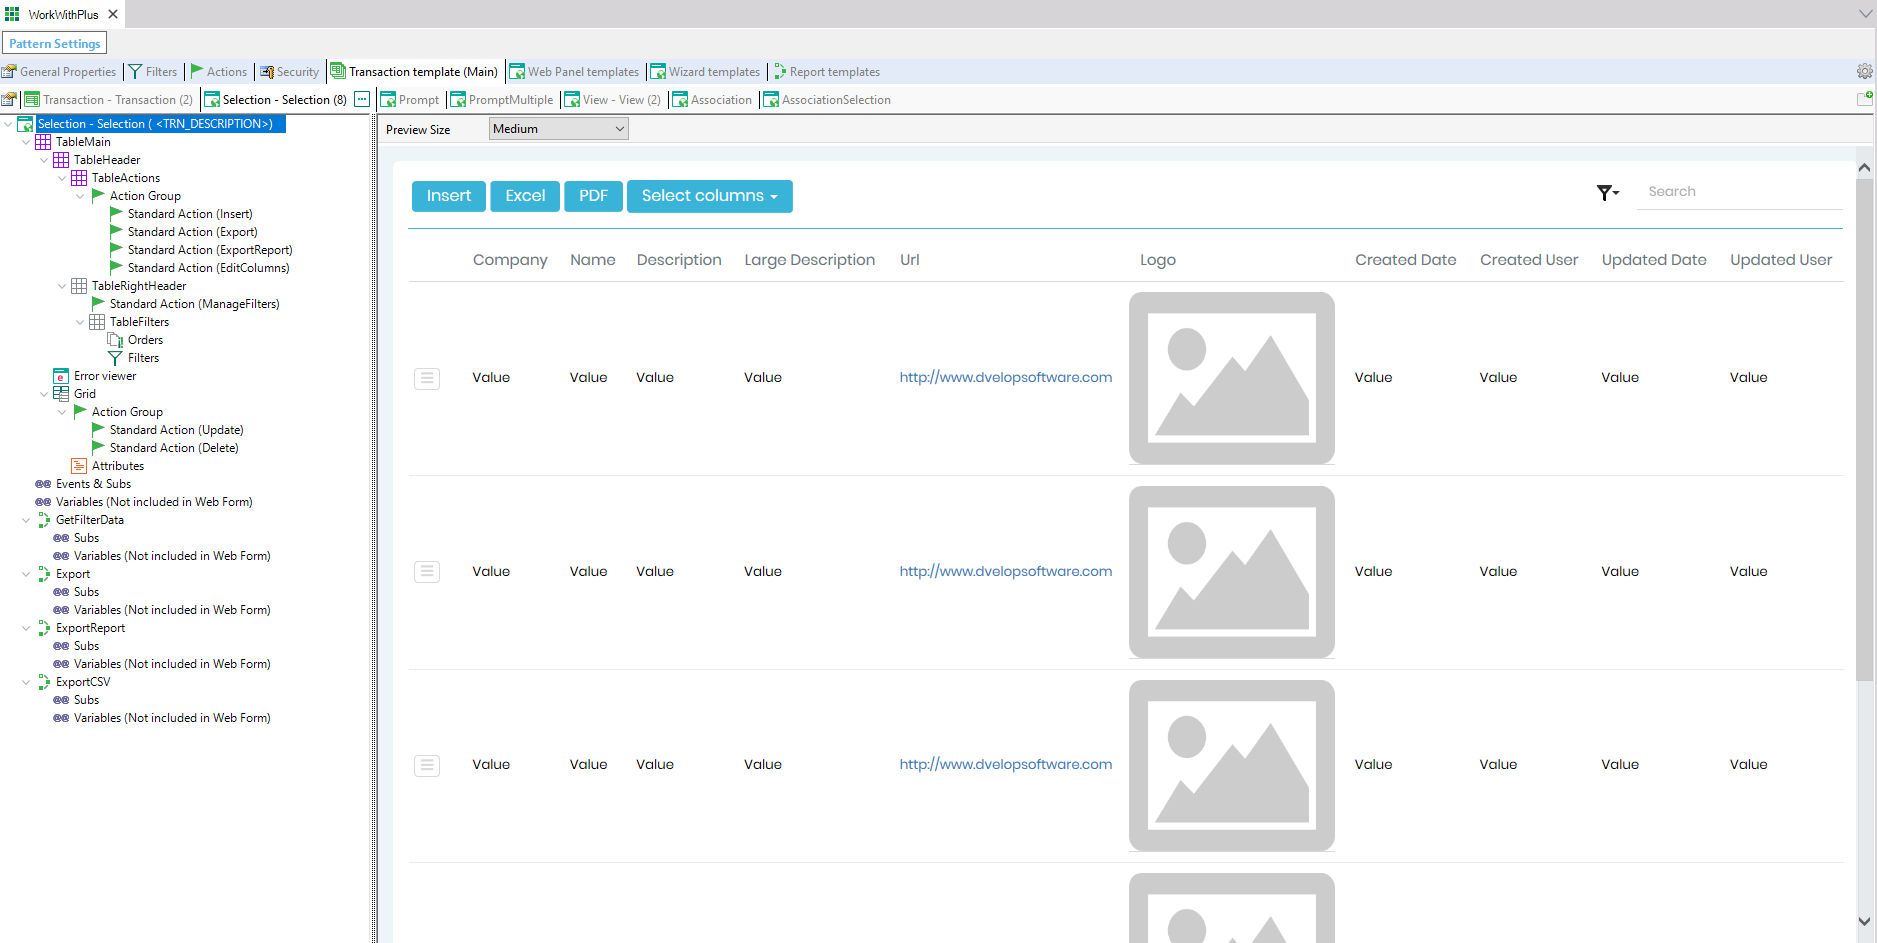
- The templates which you have before run the "Design System Wizard" that are used and are not in the new version are mantained. So you will need to modify manually these templates to adjust the design to the new version design, to do that you can compare with the "Transacion" and "Selection" designs.
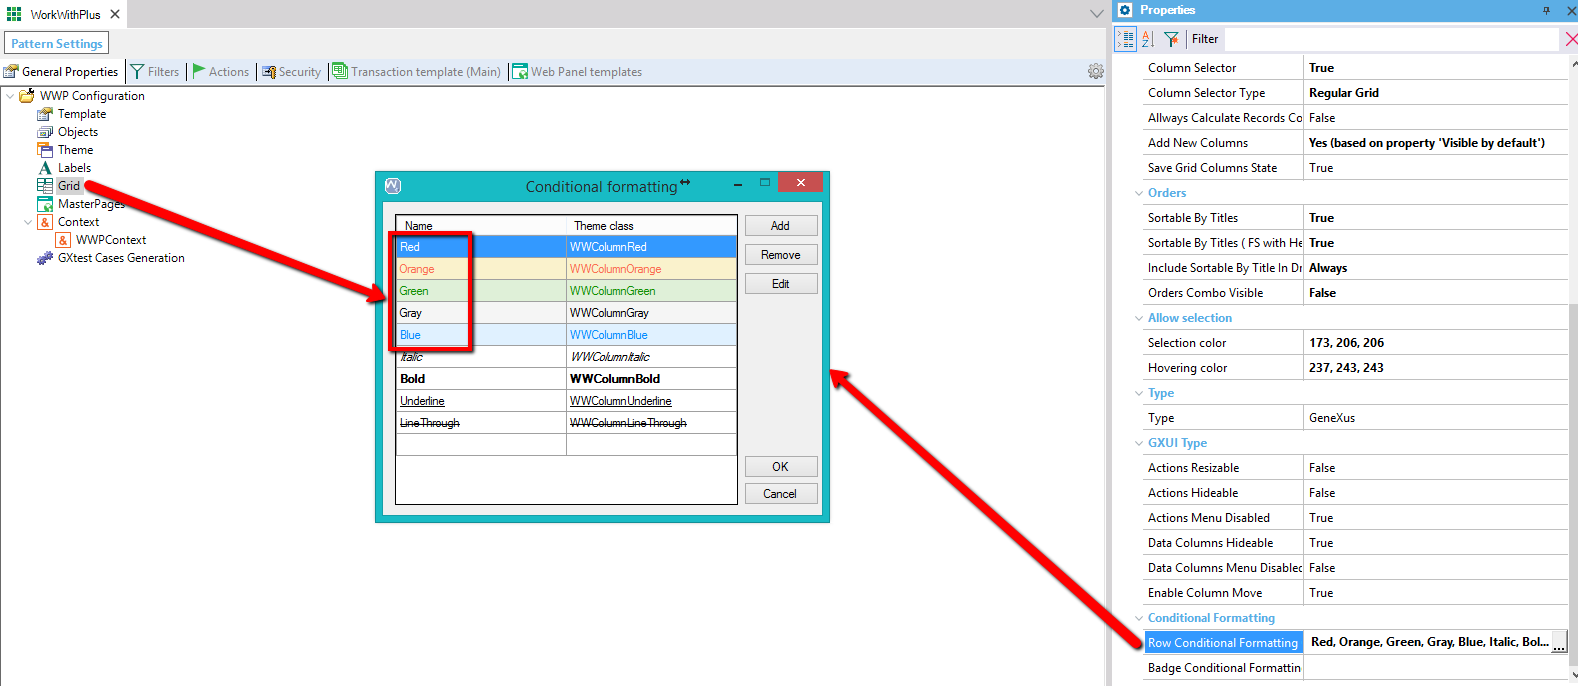
- If you are migrating from WorkWithPlus 10 and you were using Conditional Formatting, you should rename the following classes:
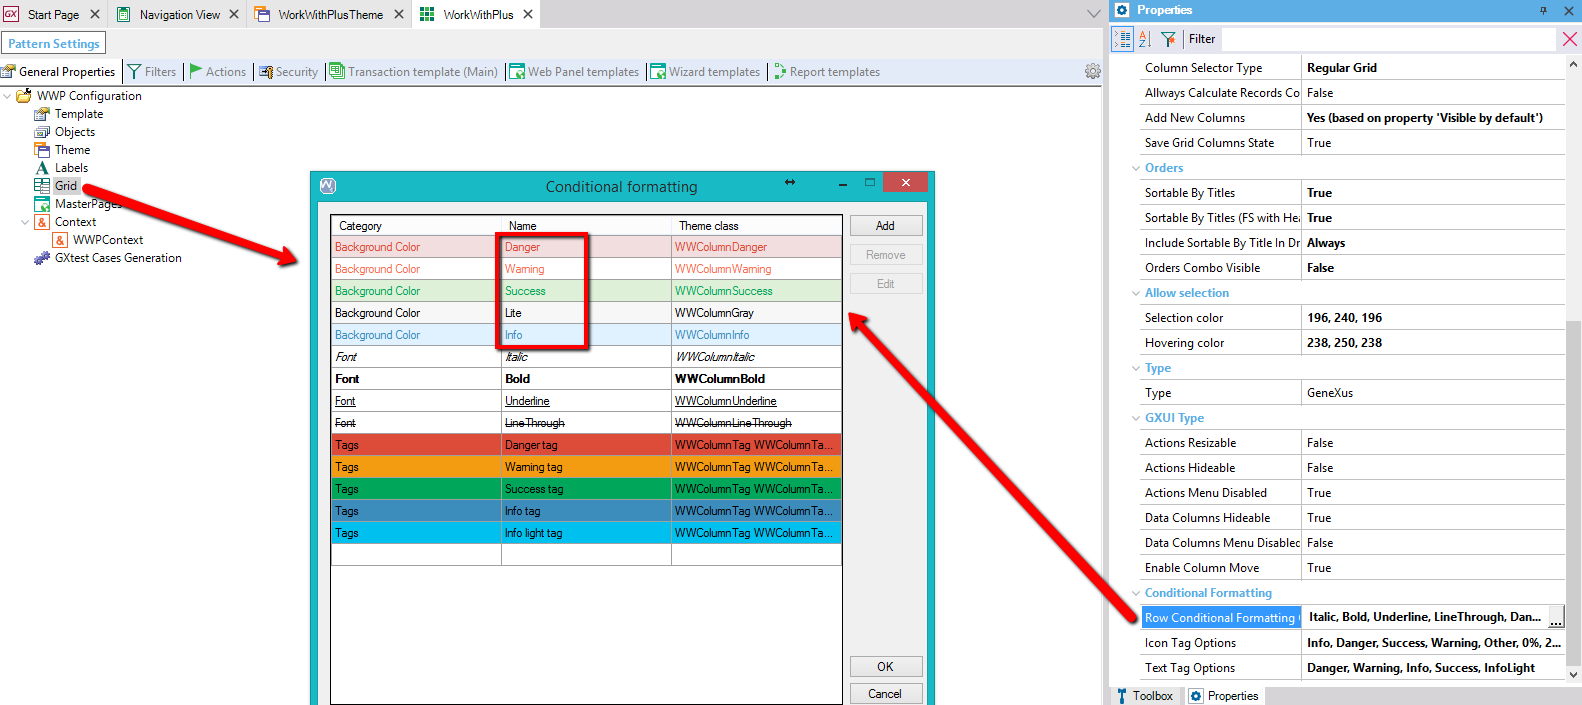
And set the names that you had in WorkWithPlus 10:
Update Instances in your Transaction templates and for each Web Panel template in order to impact the new theme in your instances:

According to the theme and settings that you have selected during the "Design System Wizard", some messages like the following may appear:
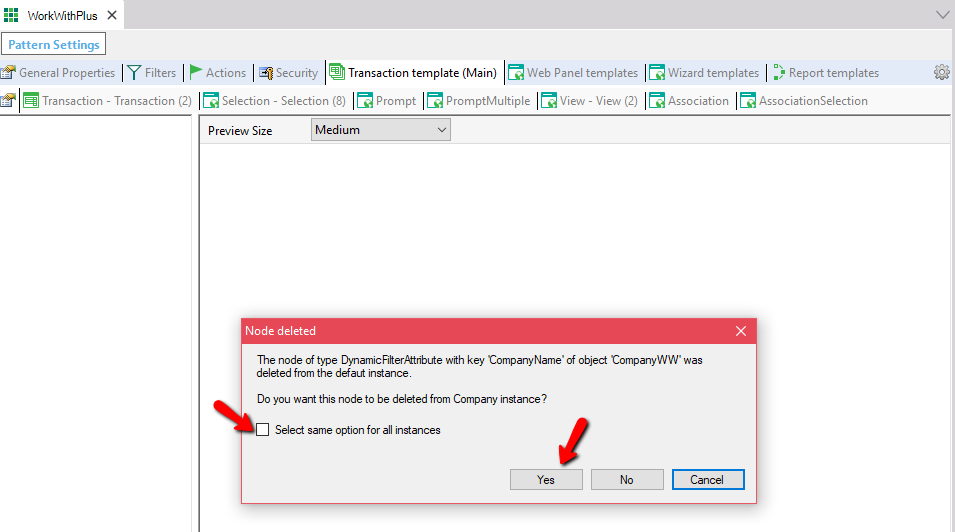
This messages ask you whether to delete some specific node from an instance or not. For example, the previous messages asks if you want to remove the "Dynamic Filters" of the Company Transaction as in the selected design the default filter is the "Full Text Search".
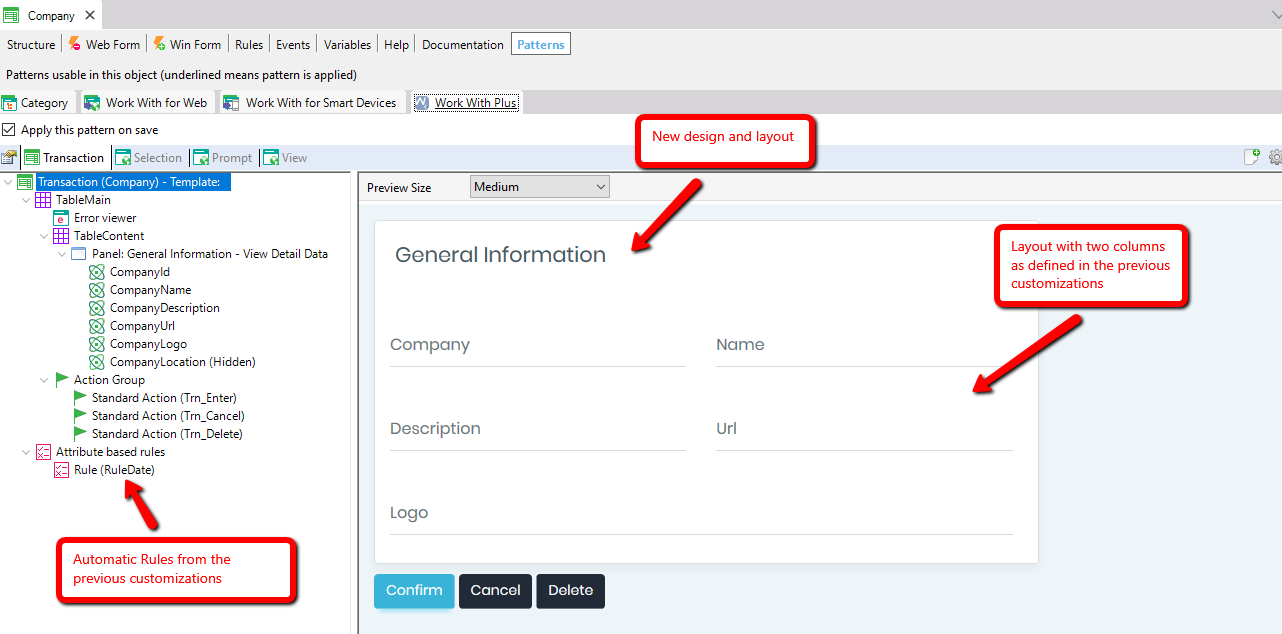
Once the "Update Instance" process is finished, if you open an instance, you will see that the new theme is applied but your previous customisations are still there:
If you are loading your menu data from the Data Provider "MenuOptionsData", you should recover its previous version ir order to display the same options you used to have.
Run your application and enioy the new design:-)
If your Knowledge Base is still in HTML (not responsive), we strongly suggest to also read the following links:
|